
時空背景
之前公司將外包給美國的網站優化機構(Conversion rate optimization agency),因為美國人工及軟體月費非常的貴,且又常常將我們網站改壞,因此我 評估了幾套套A/B Test 當成替代解決方案,但大多都要收費,找了很久才找到一套開源免費,又好用的A/B Test工具 - Featureprobe。
了解 AB Test 能幫助我們做些什麼呢?
透過AB 我們可以得知
- 通過測試不同的頁面佈局、按鈕顏色、文案等,找出哪些元素更能激勵用戶採取期望的行動,如購買產品、註冊會員或下載應用,藉此提高轉換率。
- 測試不同的定價策略或促銷活動對銷售的影響。
- 衡量重新設計的頁面或功能,有沒有比以前更好,並識別用戶界面中的問題。
運作原理
透過 Featureprobe 的後台配置測試項目的出現比例,當前端在渲染時告訴前端網頁要渲染測試項目A 或是測試項目B,當使用者觸發後台設定的轉換率時,會在後台報表中顯示流量及轉換率。
假定測試情境
設計師設計了兩個Banner,想了解Banner A、Banner B,想了解那個Banner 的使用者點擊率比較好。

參考了 官方文件
首先,我們得先建立 FeatureProbe 容器應用程式
git clone https://gitee.com/featureprobe/FeatureProbe.git

cd FeatureProbe
docker compose up
再接著,訪問先前建立的Featureprobe應用程式後台
username: admin
password: Pass1234
新增測試事件
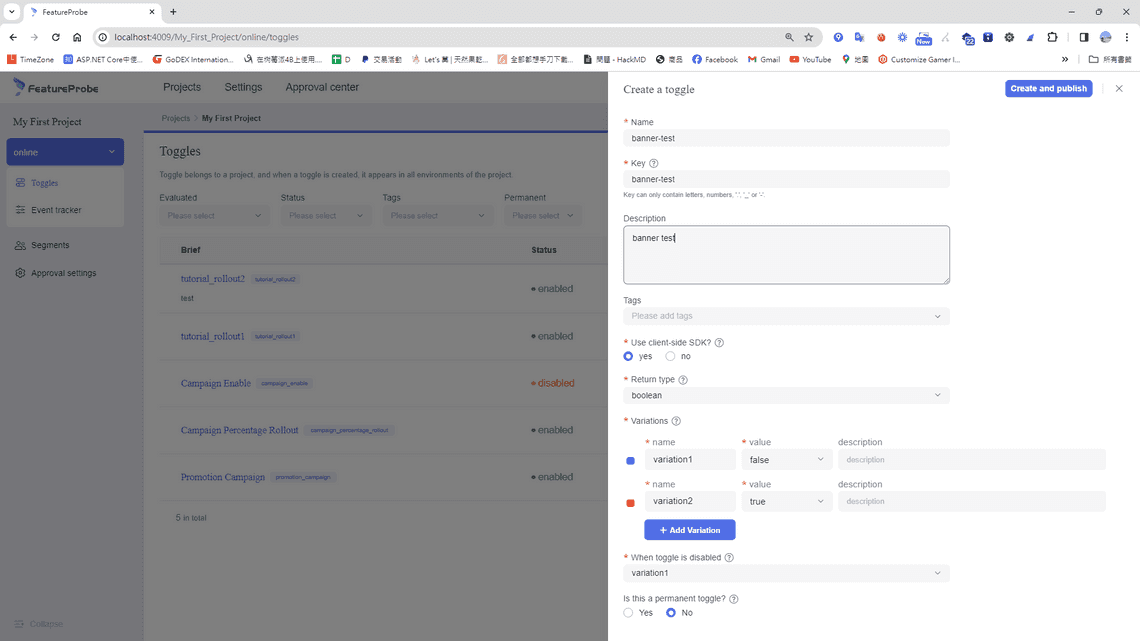
接著我們開始設定預設規則,這裡的百分比,會影響測試項目的出現機率

啟用測試,並按下發佈按鈕(Publish)

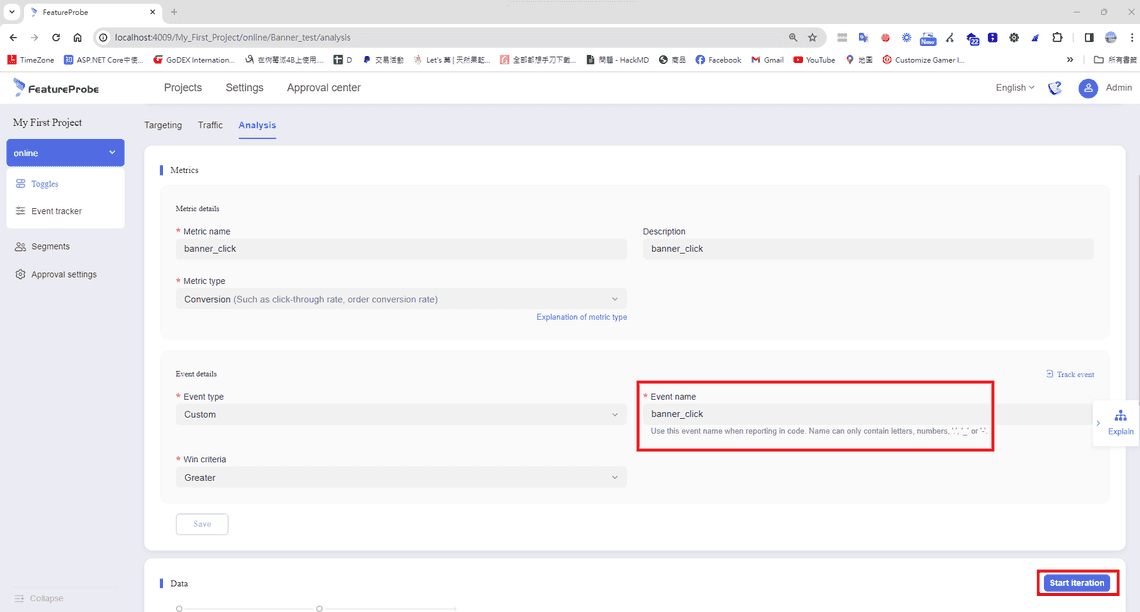
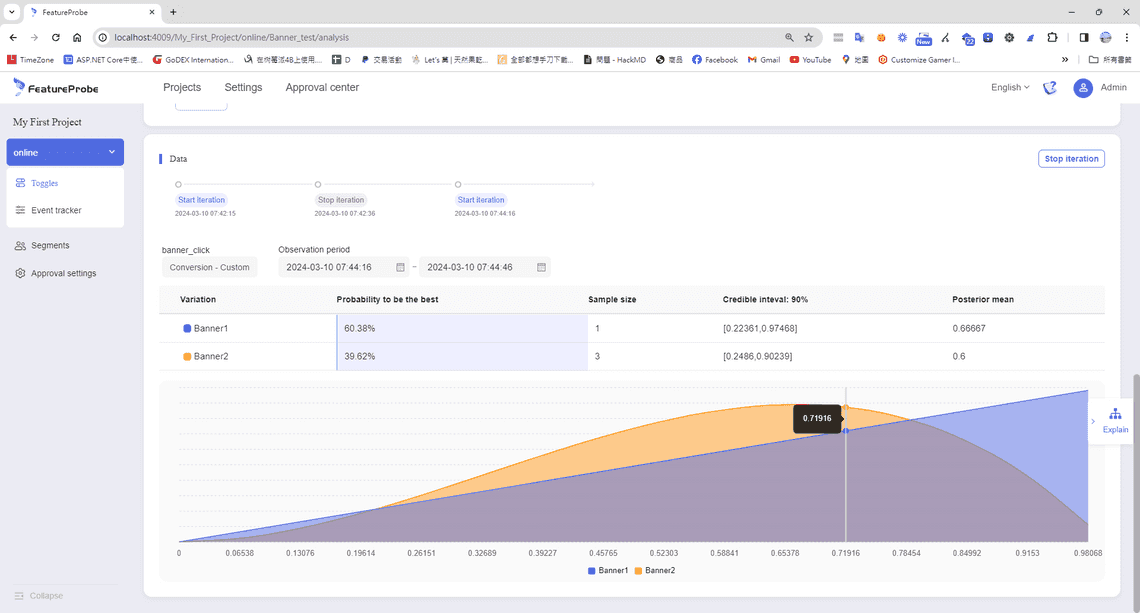
定義轉換率事件,並開按下 Start iteration 按鈕,開始蒐集事件分析
撰寫測試程式
點選 Connect SDK 按鈕,就會跳出一些程式的範例.但範例漏了一些東西,因此我小改了一下。
安裝 SDK
npm install featureprobe-client-sdk-react --save
前端程式範例 - 採用 Next js app route
將SDK 封裝成一個HOOK - use-featureprobe.ts
import { FPUser, FeatureProbe } from 'featureprobe-client-sdk-react';
import { useCallback, useEffect, useRef, useState } from 'react';

/**
 * Custom hook to initialize and use FeatureProbe client, providing feature flag value,
 * loading state, and a method to track events.
 *
 * @param {string} featureKey The key of the feature flag to evaluate
 * @param {any} defaultValue The default value of the feature flag
 * @param {FPUser} user The user object for feature evaluation
 * @returns An object containing the feature flag value, loading state, and a track method
 */
const useFeatureProbe = (featureKey: string, defaultValue: any, user: FPUser) => {
    const [featureValue, setFeatureValue] = useState<any>(defaultValue);
    const [isLoading, setIsLoading] = useState(true);
    const fpClientRef = useRef<FeatureProbe | null>(null);

    useEffect(() => {
        if (!fpClientRef.current) {
            const client = new FeatureProbe({
                remoteUrl: 'http://127.0.0.1:4007',
                user: user,
                clientSdkKey: 'client-xxxxxxxxxxxxx',
                refreshInterval: 5000,
            });

            client.start();
            fpClientRef.current = client;

            // Listener when client is ready
            const handleReady = () => {
                let result: any;

                if (typeof defaultValue === 'boolean') {
                    result = client.boolValue(featureKey, defaultValue);
                } else if (typeof defaultValue === 'string') {
                    result = client.stringValue(featureKey, defaultValue);
                }
                // Add more types as needed

                setFeatureValue(result);
                setIsLoading(false);
            };

            client.on('ready', handleReady);

            // Cleanup
            return () => {
                // client.off('ready', handleReady);
                // client.stop();
            };
        }
    }, []); // This effect depends on user, since user-specific features may require re-initialization

    // Method to track events
    const trackEvent = useCallback((eventName: string) => {
        if (fpClientRef.current) {
            fpClientRef.current.track(eventName);
        }
    }, []);

    return { featureValue, isLoading, trackEvent, client: fpClientRef.current };
};

export default useFeatureProbe;
再來撰寫 Banner A Component
'use client';
const BannerA = ({ featureValue, trackEvent }: IFeatureProbe) => {
    const clickHandler = () => {
        alert(featureValue + ' clicked');
        trackEvent('banner_click');
    };

    return (
        <div id="boolean-result" onClick={clickHandler}>
            {featureValue.toString()}
        </div>
    );
};

export default BannerA;

interface IFeatureProbe {
    featureValue: any;
    trackEvent: (eventName: string) => void;
}
再來撰寫 Banner B Component
'use client';
const BannerB = ({ featureValue, trackEvent }: IFeatureProbe) => {
    const clickHandler = () => {
        alert(featureValue + ' clicked');
        trackEvent('banner_click');
    };

    return (
        <div id="boolean-result" onClick={clickHandler}>
            {featureValue.toString()}
        </div>
    );
};

export default BannerB;

interface IFeatureProbe {
    featureValue: any;
    trackEvent: (eventName: string) => void;
}
新增 AB Test 的頁面
'use client';

import useFeatureProbe from '@/hooks/use-featureprobe';
import dynamic from 'next/dynamic';
const BannerA = dynamic(() => import('@components/ab-test/banner-a'));
const BannerB = dynamic(() => import('@components/ab-test/banner-b'));

import { FPUser } from 'featureprobe-client-sdk-react';

export default function Page() {
    const user = new FPUser();
    const { featureValue, isLoading, trackEvent } = useFeatureProbe('Banner_test', '', user);

    return (
        <main className="flex flex-col items-center justify-between min-h-screen p-24">
            {isLoading && <div>Loading...</div>}

            {!isLoading && <BannerA featureValue={featureValue} trackEvent={trackEvent}></BannerA>}
            {!isLoading && <BannerB featureValue={featureValue} trackEvent={trackEvent}></BannerB>}
        </main>
    );
}
P.S.因為我們使用 Next js 因此,在做 A/B Test 的頁面不能把頁面cache 起來(ISR),A/B Test 頁面必須是SSR 或是CSR
此時只要在畫面重新整理,就會依據先前設定的比例出現相對應的測試情境
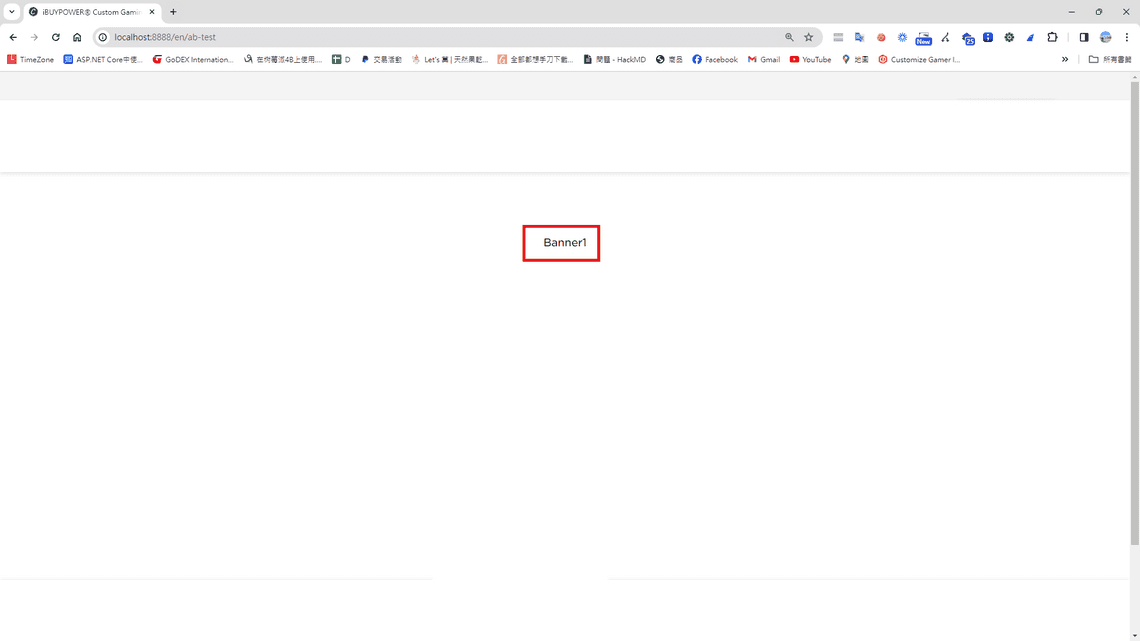
如何除錯 (畫面上按下 Open 才開啟除錯模式)
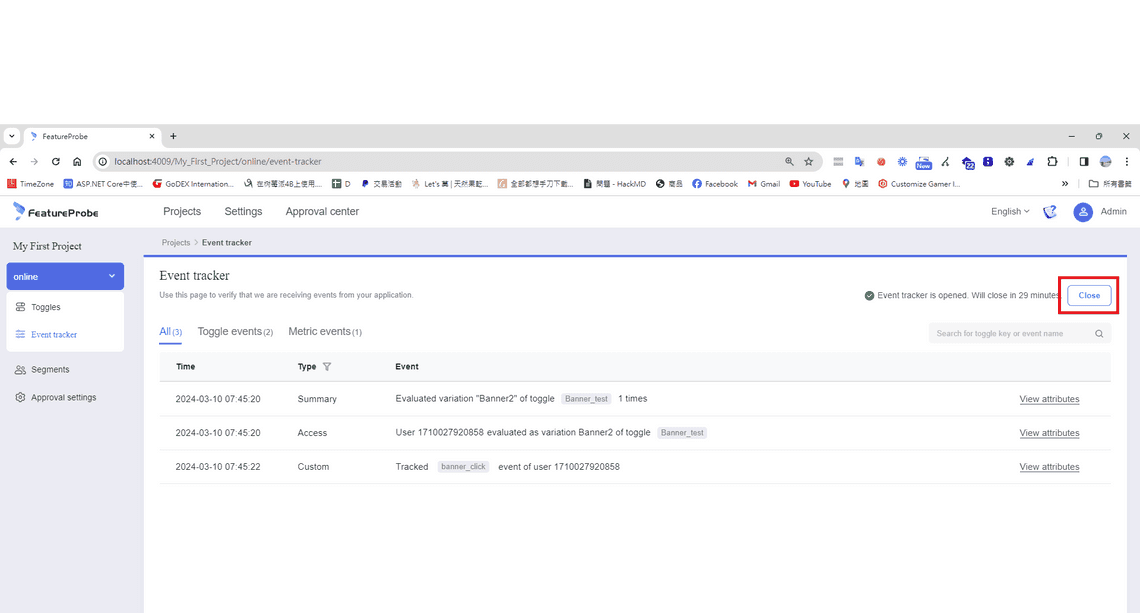
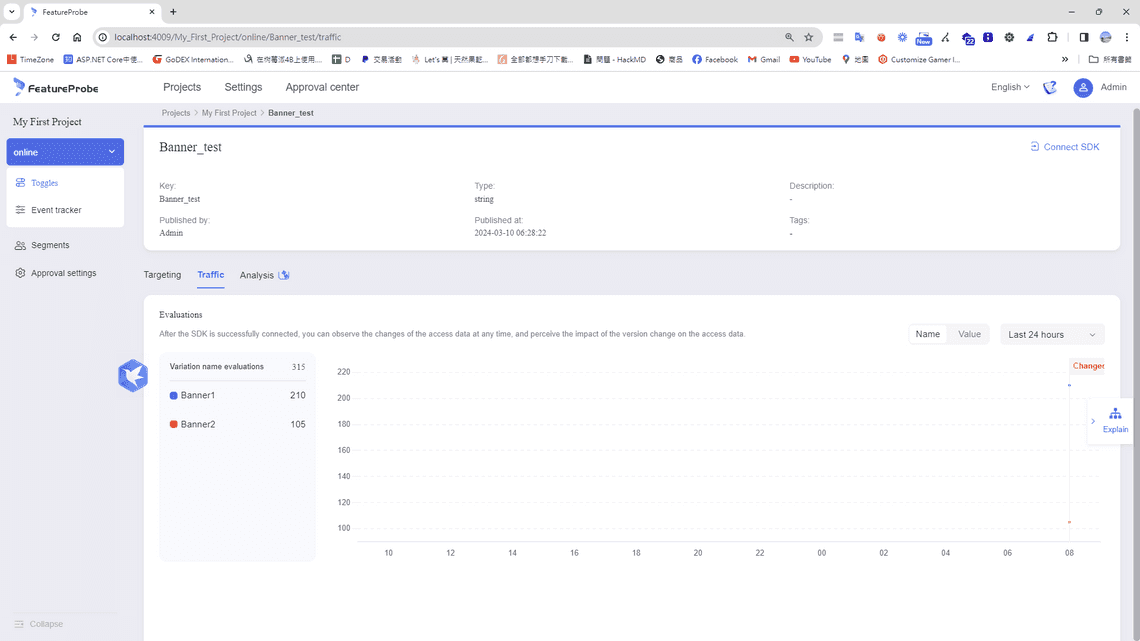
接著,我們來看數據報表
流量報表
轉換率報表
進階應用 - 依據傳入條件及分組規則獲取相對應的測試情境
當我建立規則中指定 City 等於台北則,顯示 Banner A,City 等於高雄,就顯示Banner B ,在程式中指定使用者為台北的用戶,就可以彈性依據不同的資料,而給不同的測試。
P.S. Featureprobe 本身沒有 sticky cookie 的機制,但它的程式蠻靈活的,可以透過自己寫入讀取cookie及後台設定條件,讓使用者在測試階段顯示一樣的畫面。
const user = new FPUser().with('City', '台北');
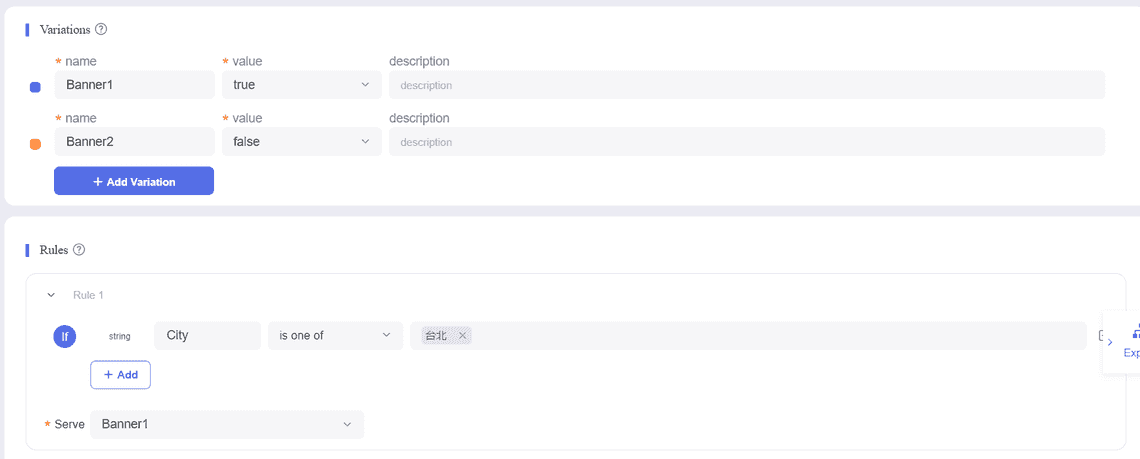
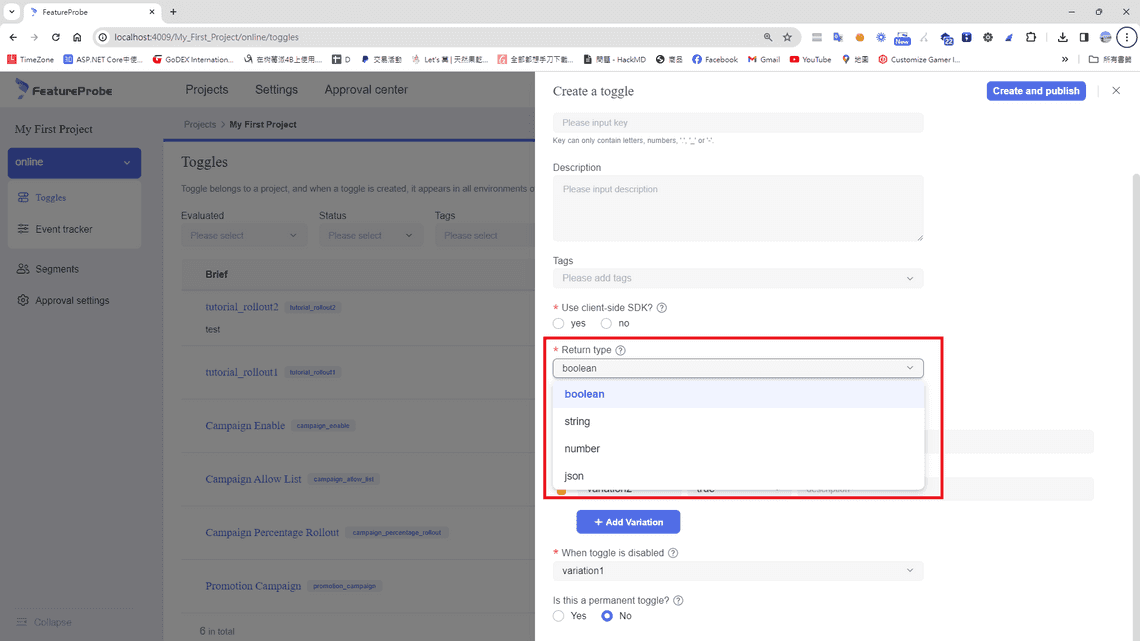
當然不僅有 true 和false ,在建立時可以選擇其他種型態,像string ,這樣就能一次測試多種的測試情境
最後
做A/B Test 的成本蠻高的,應該是拿重要功能,小範圍的去做比較,透過使用Featureprobe進行A/B測試,我們可以快速得到了實用的洞察,Featureprobe以其直觀的用戶界面和強大的分析功能脫穎而出,使測試設計和結果評估變得簡單高效,我們確定了哪些改動最能提高用戶參與度和轉化率,從而協助我們的產品迭代,Featureprobe的靈活性和易用性對於支持多樣化測試非常有幫助,確保我們能夠基於數據做出精確的產品決策。


